Wednesday, December 28, 2016
Goodbye 2016
If anything, this year has been extremely interesting.
Before starting this post, I was ready to call 2016 a lot of bad names but once I started gathering some thoughts about what I was going to include here, I immediately felt it would not do.
It was easy to lose heart and despair this year: from the heavy heart from all the injustice, war and violence happening in the world to the constant blows of loosing people you often recur to their art for comfort and to that adding the incertitude that the world is in the hands of a few of the craziest people, sometimes it was just too much, wasn't it? It all felt like a constant burden that made it hard to even try to see the beauty of everything else.
But then, there is beauty and more than ever we must find it in the little things that, in truth, are the most important things. The smile of the people we love that sometimes we take for granted. The warmth of my husband's hand, the pure laughter of my daughter, the movements of the baby growing in my womb, the blessing of having a roof over our heads and a place to be together. The gifts nature gives us everyday: a snowfall, the waking of nature in spring, the feel of sunshine in the skin on a summer day, the leaves gently falling during autumn, the winter that comes and makes everything sleepy, giving us the chance to gather and slow down.
All those things that are so simple, but that are the most important were ever present and I'm so grateful. This doesn't mean I forget that so many people are going through awful times all ove the world and that I need to do my part everyday to help, as a human being. That I need to speak my mind when I see injustice, to extend my hand when I see need, and to care, to never give to disinterest.
So, thank you 2016, for the blessings and for the blows too because those will make us even stronger to stand for what we need to, everyday.
Thank you for keeping up with my blog and for your continuous support all this year!
xx
Iveth
Saturday, November 19, 2016
Behind the scenes: 2016 Christmas cards
Oh, how I love paper!
I don't even know when it started but even since I remember I love everything to do with paper. From handwritten letters, to photographs and books and notebooks. Then, I'd start buying / hoarding paper, like, just because its pretty colours or interesting textures or cool patterns. I've tried to craft my way with paper too, from book binding, notebook making, to collages, to pompoms to piñatas, definitely an eclectic mix but it all for my love for paper. It's been years since I keep a drawer unit full of paper (told you, I'm a paper hoarder) and is always the best when I get to use it!
All this to tell you a story: This summer we spent a week in Nova Scotia, a place that has the effect of filling me with inspiration. This time it was not the exception. One day, Amelia and I visited the Public Library and Amelia got into herself to play in the computers. While I was sitting, defeated in the fact that she wasn't in the mood to check out books with me but just play games, my eye caught the cover of this book that had colourful flowers on it. I lunged to grab it immediately, like a hungry person being offered a box of warm donuts and my, oh my it was love at first sight. I could feel the sparkle coming out of my eyes and heart in that very moment. The book is called From paper to Petal and if you like paper or flowers, gawd, you NEED to see it. After hungrily finishing it all in one afternoon I went straight out to the nearest Omer DeSerres (for those outside Canada, it's a art supply shop)completely set on getting crepe paper and all the supplies I'd need to start making paper flowers. Alas, it was a bit disappointing to find out this shop doesn't carry much interesting stuff for paper flower-making but, hey, what's Etsy and Amazon for, right? I made my first order of crepe paper that same day, eager to receive it and start making!
Once I got all my supplies and made my first flower, I knew I was hooked. I felt like paper had a bigger purpose in life now and that I had found it! Total revelation. Ever since, I've been dedicating a few hours a day to make flowers and beside finding it immensely rewarding, it's also a relaxing and calming activity, which is something that benefits me greatly.
So, all this to tell you that after starting making these flowers I knew I had to find more ways to put them to use and share them with everybody and the idea of making holiday cards came up. Next, I invite you to see a few photos of the process, from flower making to photography. I hope you enjoy it!
It was really fun to make all the flowers, practising my -poor- calligraphy skills and do paper cuts for the words. Then the photoshot was great and then the editing and looking forward to the final result after so many weeks of working on this project! Then the graphic design part wasn't going that well (I suck at it) but then I had lots of help when Christen Strang jumped in to save the day and helped me get ready for printing! Thank you so much girl! So as you can see, a long but very cool process.
If you'd like to see more about the finished cards, visit my previous blog post or simply visit my shop! Thank you so much for your support!
Iveth
SaveSave
New Holiday greeting cards!

Hello!
I want to share with you a shop update: I just added a small collection of greeting cards for the holidays! I've been working on this project for a couple of months now and couldn't be any more happy about the end result and the process was something that I enjoyed enormously.
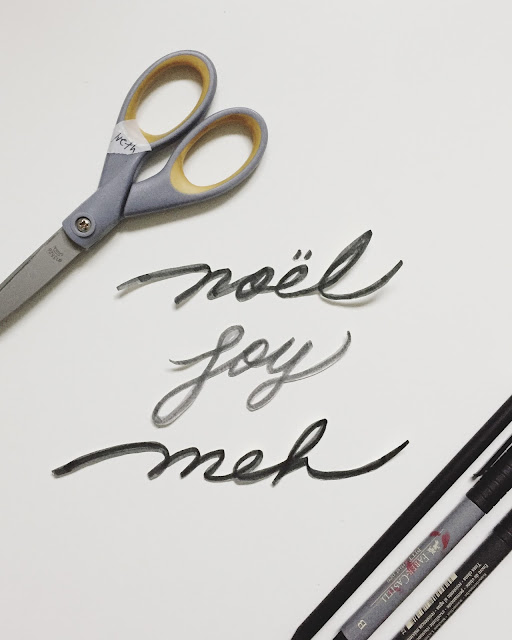
I'm launching three cards, all with a black background and framed by an array of paper flowers, twigs and winter berries in red, white, gold and green and in the center, a simple word in gold hand lettering. The word represent an idea or sentiment about Christmas: The first in JOY, then comes NOËL, for my french speaking costumers and then we have a funny one, MEH, because we all have that special person that just doesn't like Christmas (in my case, my husband!).
As you can see, I have you covered!
For more details, click on the images to be directed to the shop. I hope you like them as much as i do!
Coming up, a behind the scenes of the making of the Holiday greeting cards, from the inspiration and process to end result!
Thanks for visiting my blog!
Iveth
SaveSaveSaveSave
Monday, November 7, 2016
Amelia's birthday party!
8 years ago, on a cold November day, the biggest treasure life has given me came into this world.
Every day I'm amazed to see my Amelia grow, become her own person and fill our days with happiness and I'm so, so grateful for each of those moments. She's my funny, intelligent, determined, caring and loving little girl!
One of her favourite things in the world is cats and we decided to make a cat-themed party to treat her and celebrate her. It was so much fun, from project planning to making, cooking and decorating to see her go wow with every detail! We crafted the crap out of it, mostly used materials we already had (I'm a paper junky and have drawers full of it so it was nice to get to use it and also, reuse some from old projects!).
Next, a few photos from the party and bellow, the resources from the ideas and inspiration. Look how happy Amelia was :D
Resources and ideas
Cake: I bought the "Ricardo: nos meilleurs gateaux" book and it was totally worth it because the cake was the best cake I have ever made (well, not that I made good cake, to be honest, hardly LOL! but this was good!)! The end cake was an invention of Amelia and I, but we based all the cake and frosting recipes from the book. I wanted to make a part vanilla, part chocolate cake with vanilla frosting, so the colour would go well with the rest of the decorations but Amelia wanted raspberry frosting so we decided to put the raspberry in the middle of the cake. You couldn't see it until we cut it and it was not just a beautiful thing but delicious! And as I made both, chocolate and vanilla cakes, there's was a lot of cake dough left so we made cupcakes too: vanilla with raspberry frosting and chocolate with vanilla frosting. My faves were the chocolate ones, they were scrumptious!
Cat bunting: Thanks Pinterest for all the great ideas! we found so many cool stuff and inspiration. I based my bunting in this DIY post by A Subtle Revelry but changed the colours and instead of cutting the cats double and folding/glue them, I made a single sheet face and punched some holes to pass the twine through I used a glittery silver twine to match the decor and lots of black, white and gold for the faces.
I also made some extra circle bunting with some old circles I had from a craft show decorations from some years ago. it was nice to get to reuse that and it gave the wall a nice, fun touch that complemented the cat bunting perfectly.
Piñata: I follower this tutorial by 100 layer cake-let which was so easy and the piñata came up looking pretty cool! It could have looked better to be honest, but I tried not to put too much effort in it because the plan was of course, to smash it, so the less I felt attached to it, the better! Only thing, it was way to fragile for a bunch of hyped 8 years-olds so it came undone quite fast, lol! So next time, I'll make it sturdier!
Cake props: I saw this cat party Oh Happy Day throw with these funny props and I knew they were going to be perfect for Amelia as they reflect her sense of humour! They looked amazing, so funny! I added a little bunting with Amelia's name that a pair of cats were holding, to make the came more personalized.
Favour bags: I got the idea from Bog & Ide. The bags looks super cute and the kids loved them! Plus we made the cat faces folding to parts of paper, like a card, and Amelia wrote a thank you message for her friends on the inside, so it had a nice, personal touch. We filled the bags with fish cookies, chocolate, gummies and a fun little toy.
Invitations: I did not take a photo of them but should have because they were real cute. I painted them myself, little cat faces and then just added the text using Picmonkey.
Other decor: The honey comb balls were reused from previous years and I got them from Party A Decor on Etsy!
Food: We got pizza + juice for the kids and we treat the parents with a tacos! It was SO GOOD, honestly. We cooked three different fillings + we had lots of guacamole, warm tortillas, two different types of salsa and a couple of veggie accompaniments. I'm still dreaming of those tacos, I want to make more!
Best thing of all of course, my girl had a great time! Thanks for checking out my blog!
Iveth
Labels:
Amelia,
birthday,
bunting,
cake,
cat bunting,
cat party,
cat props,
cat theme party,
decoration,
family,
kitty cat,
party,
piñata
Tuesday, October 25, 2016
Shop update: New jewellery!
I just listed a bunch of new rings to the shop!
Some of them add to te FOLIAGE collection, like the Foliage ring in bronze (which has been a HUGE fave with my local customers since I launched at Puces POP last month) and the much loved Tulip ring, which is so lovely.
And then I added 4 new rings that are part of a small, minimalistic line of rings I made also for my local customers at Puces POP last month, but I thought you might like them, too, so I added just a few sizes! They are called the LOOP and WAVE rings and defined by clean lines and an inner itch for beautiful simplicity. I still don't know if I'm going to continue this line, if I'm going to expand it or if its just a limited edition, truly. I'm still thinking but, for the moment, there they are, I hope you love them!
And here a few photos of them. For more details go to The Angry Weather shop or click on the images to go to the listing!

Thanks for keeping up with my little blog and shop!
Iveth
SaveSaveSaveSaveSaveSaveSaveSaveSaveSave
Some of them add to te FOLIAGE collection, like the Foliage ring in bronze (which has been a HUGE fave with my local customers since I launched at Puces POP last month) and the much loved Tulip ring, which is so lovely.
And then I added 4 new rings that are part of a small, minimalistic line of rings I made also for my local customers at Puces POP last month, but I thought you might like them, too, so I added just a few sizes! They are called the LOOP and WAVE rings and defined by clean lines and an inner itch for beautiful simplicity. I still don't know if I'm going to continue this line, if I'm going to expand it or if its just a limited edition, truly. I'm still thinking but, for the moment, there they are, I hope you love them!
And here a few photos of them. For more details go to The Angry Weather shop or click on the images to go to the listing!

Thanks for keeping up with my little blog and shop!
Iveth
SaveSaveSaveSaveSaveSaveSaveSaveSaveSave
Labels:
announcement,
Etsy,
look book,
minimal,
my jewelry,
my shop,
new listing,
rings,
rose gold,
shop update,
The Angry Weather,
yellow gold
Subscribe to:
Comments (Atom)
